|
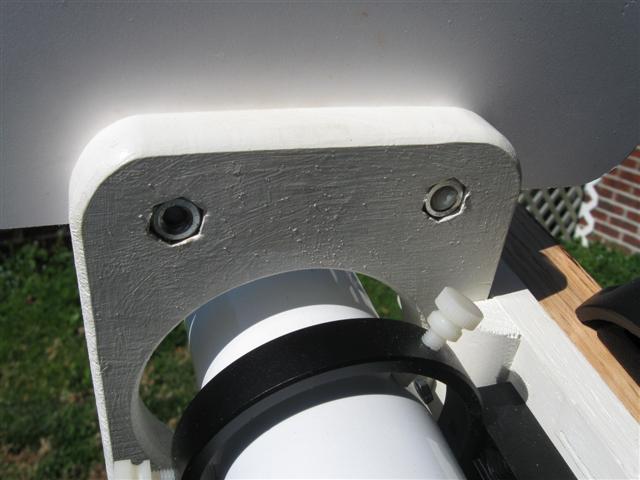
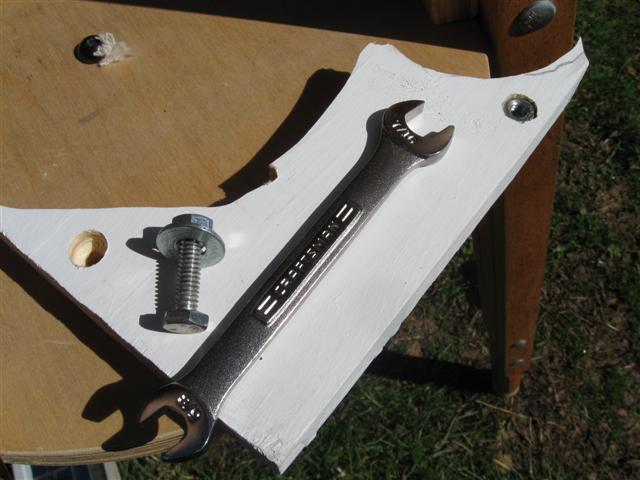
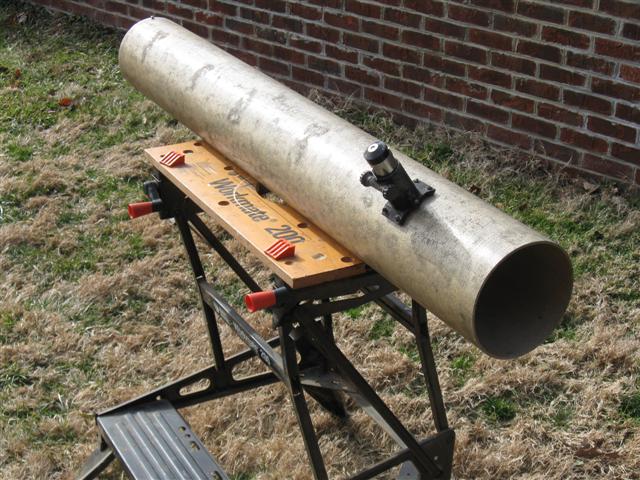
Here are two pretty easy ATM tips. Recently I acquired a very old 6-in f/8 newtonian optical tube assembly. It appeared to have been put together nearly 40 years ago. The tube was fiberglass but had never been painted inside or out. The end of the tube where the primary mirror cell was attached was nice and square. The focuser end of the tube was ragged and a little longer than necessary. Since the OTA needed to be completely disassembled for cleaning and painting anyway I decided to cut a couple of inches off the end of the tube. This cut needed to be square and smooth. But how to do it safely and accurately? There is no shortage of power saws in my shop but I was not sure that was the best way to go. I certainly did not want a lot of fiberglass dust drifting around my basement. Internet research provided some good suggestions. I set up a portable sawhorse/work table outside. A slightly stiff straight edge that could be wrapped around the tube to act as a saw guide was made from an old coarse grit belt sander belt. This was held to the tube with rubber bands and wood spring clamps. A large round wood disc was hammer tapped into the tube until it fit under the saw cut. The wood disc provided a firm support to keep the tube edge from splitting. Finally an electric fan was turned on to blow any fine dust away from the work area. Using a hacksaw with a new fine toothed blade I slowly and carefully cut a shallow kerf, rotating the tube until the cut line went completely around the tube. This was repeated two or three more times, each cut getting deeper. In just a few minutes the soon to be discarded end of the tube fell off. The result was a square cut that was very clean and would only need a minimal amount of sanding. If you try cutting fiberglass be sure to wear a dust mask. For a “Big Dob Project” I needed to make an altitude brake out of red oak. It would be a piece of wood with a knob that when turned it would put pressure on the altitude bearing. Wood threads would soon wear out but there was not enough room in the piece for a T-nut. A threaded brass insert would work but I did not have any of the 5/16-inch size appropriate for this little part. I could have driven to the local Woodcraft store and bought a 10 pack of threaded inserts but surely there was another way. I could have just counter sunk a nut and secured it with epoxy. But the rotational forces would probably cause the epoxy bond to fail after several uses. After some thinking it dawned on me that if a nut could be epoxied into a hole that had exactly the same edge profile as the nut there should be plenty of resistance to those rotational forces. I drilled a 5/16-in hole through a piece of scrap oak. On one side I drilled a hole half way through. This hole was exactly the same diameter as the flats of the nut. Using a washer, a bolt and a wrench I tried to pull the nut into the wood. No go, the oak was too tough. I took a drill bit that was the same diameter as the widest points of the nut and drilled a hole that only went part way into the wood. This time the wrench was able to pull the nut all the way into the hole. Success! I used this same method on the altitude brake part but also put a dab of epoxy in the base of the hole to keep the nut secured. By the way, if you use this method on soft woods such as pine only the first countersunk hole needs to be drilled. The softer fibers of pine will crush easily and the nut goes right in, nice and snug. This is how I put two nuts in the sun shield holder of my solar scope.
1 Comment
|
About the Author:
Terry Alford has been an avid amateur astronomer since 1979. He is currently a member of two astro clubs: Bays Mountain Astronomy Club (founding member) and Bristol Astronomy Club. Since 2001 Terry has taught Astronomy Labs at East TN State University. His first ATM project was in 1979 and was an equatorial pipe mount for an 8-in reflector. His woodworking shop also turns out toys for grandkids. Archives
June 2017
Categories |
 RSS Feed
