|
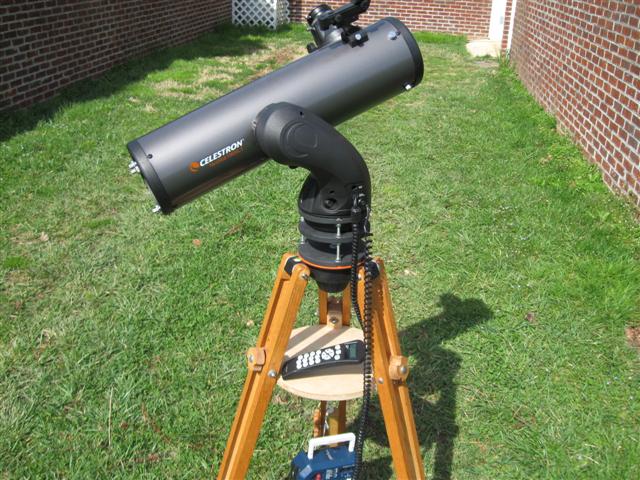
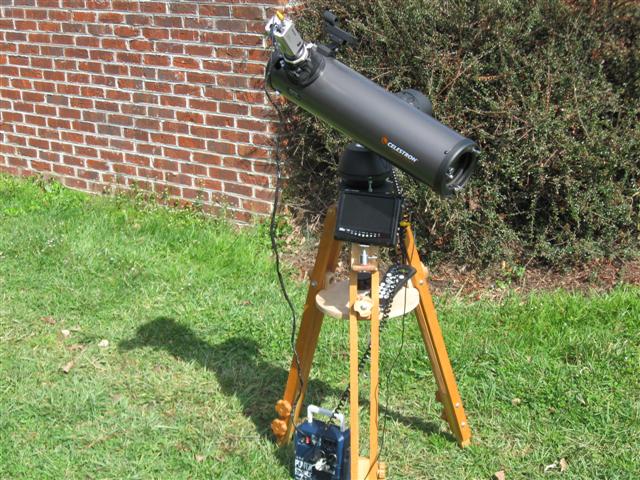
The Celestron 130 SLT I got a couple of years ago is an all around nice little 5.1-in newtonian on an Alt-Az Go-To mount. But no telescope/mount combo is perfect and in order to save manufacturing costs some “lesser expensive” alternative routes were taken. The biggest problem for me was the tripod. The legs are very lightweight and actually sagged a little under the weight of the scope. The tripod spreader was flimsy plastic and looked like it would break if one stared at it hard enough. Oh, the tripod worked. It folded up compactly and was very lightweight. But all this transformed into a lot of scope shaking under the lightest pressure. A sharp tap of my hand on the end of the telescope's tube turned into vibrations that lasted more than six seconds. This was not a major problem when the scope was being used visually as a low power instrument. But it was not acceptable when coupled to my video CCD camera which I use for outreach. The camera operates with much more magnification. The image of the Moon would dance all over the monitor whenever I adjusted the camera or the wind blew very much. The solution was easy. About 20 years ago I built an oak tripod for a Polaris mount. Later this tripod was used on a Super Polaris mount. Later again I added an aluminum tripod with a larger height adjustment range to the SP mount so the oak tripod became available. The tripod was too tall for the small newtonian so I replaced the center, sliding leg sections with shorter pieces of wood. The result was a much more solid arrangement. While the wood tripod added a couple of pounds to the scope's weight dampening time was reduced to less than two seconds. One other undesirable characteristic of the 130 SLT was the maximum altitude the mount could reach. The altitude limit was set at the factory to 60° to keep the scope from hitting the tripod legs. Such a setting totally prevented observing objects higher overhead where they are best seen. There was a definite need for a mount extension. After some experimentation it became obvious that the tube would never clear the base of the mount. But if it could clear the top of the tripod the scope could go much higher it altitude, maybe to 85°. I decided on a 4.5-inch mount extension. I took some scrap 1/2-inch thick plywood and cut out two discs and one ring. Using three sections of 1/4x20 threaded rod and some nuts and washers it was easy to adjust the spacing for maximum effect. The disc in the middle attached to the mount with a bolt and lock washer. A long coupling nut was bolted to the bottom disc to allow the factory hand knob to attach to the pier. I reset the altitude limit to 80°. The scope and mount are absolutely no less stable than in the “factory” mode and this little mod worked great. Total cost was about $4. I started to enclose the mount with painted aluminum flashing but then I remembered what the Mini-Tower looked like... The photos show what the set-up looks like for both visual and astro vidoegraphy.
1 Comment
|
About the Author:
Terry Alford has been an avid amateur astronomer since 1979. He is currently a member of two astro clubs: Bays Mountain Astronomy Club (founding member) and Bristol Astronomy Club. Since 2001 Terry has taught Astronomy Labs at East TN State University. His first ATM project was in 1979 and was an equatorial pipe mount for an 8-in reflector. His woodworking shop also turns out toys for grandkids. Archives
June 2017
Categories |


 RSS Feed
